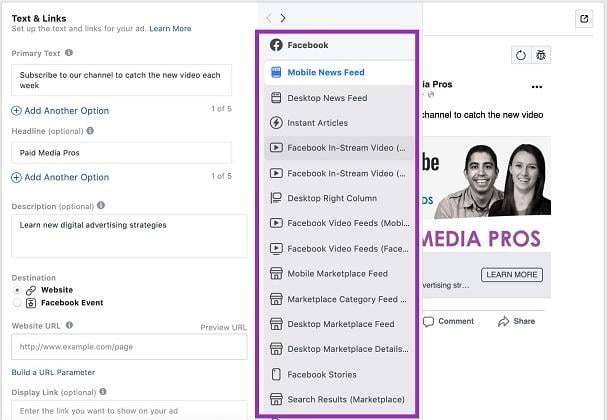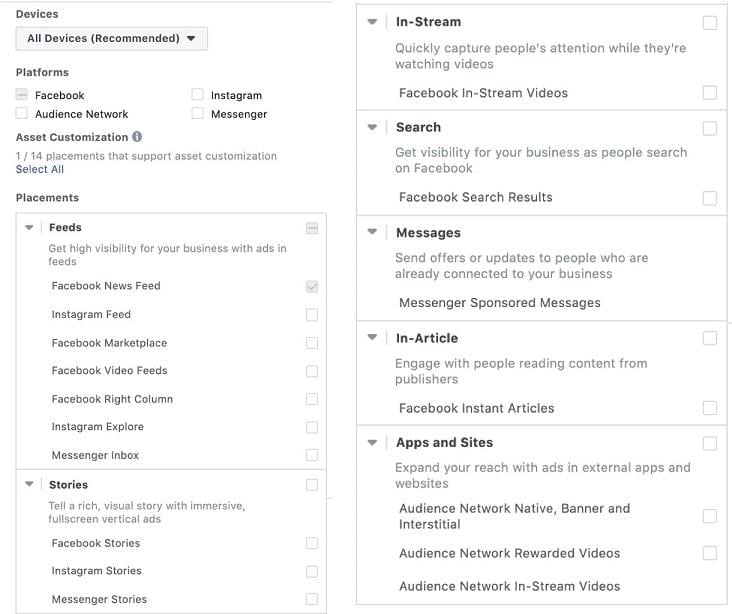
When you create campaigns and ad sets, you have the option to select placements you want to target users on. The list is continually growing and changing, but here’s what it looks like as of publication.
With all of these placements listed, what are you to do with them? Which do you choose? Which do you exclude?
The answer, as I’m sure you’re aware, isn’t cut and dry.
In this guide, I’m going to break down what you need to know to determine which placements to use and how to customize your Facebook ads for placements.
Let’s first jump into placements as a whole and what they mean.
Reach more of your audience with Facebook ad placements
No placement is inherently good or bad, despite some feelings that people may have. No matter which placement you choose, Facebook is only going to show your ads to the audience you’ve selected. Adding Instagram doesn’t mean you’ll all of a sudden start serving to only millennial influencers and adding the Audience Network doesn’t mean you’ll serve on the dark web or someplace nefarious.
What placements do is effectively let you reach your audience as they find their way around the Facebook network in the way that they engage with it. There are some users who only have Facebook, while others only have Instagram. If you were to exclude one or the other, you could miss out on some portion of your audience entirely.
As you can see from the list in the previous section, there are quite a number of places users can engage, and I encourage you to let only two things influence whether your ads show in one place or another:
- Performance
- How your ads look
The first is relatively straightforward. Start off with all placements shown and if performance is good, then keep it. If performance for a specific placement is bad, then turn it off. Easy.
The second takes a little more art than science. Here’s the key question I want you to ask yourself when creating an ad:
Does my ad look okay in that placement?
It’s as simple as that. Does my ad look okay here or not?
The easiest way to find this out is to use the preview tools while building ads.
On the right-hand side of the ad builder, you’ll see a list of placements you can review your ad in. Keep in mind that you’ll only see a preview for placements you’ve opted into at the ad set level.
Click through each of these and see what your ad looks like. Does it look great? Just fine? Horrible? Is there a little wasted space or is there a face that’s cut out of the image?
If you notice that your ad looks terrible in a placement, your first reaction might be to turn off that placement, but not so fast. Facebook has another set of tools up their sleeve that will help you make the most of every placement and put your brand’s best foot forward.
Customize ads by placement
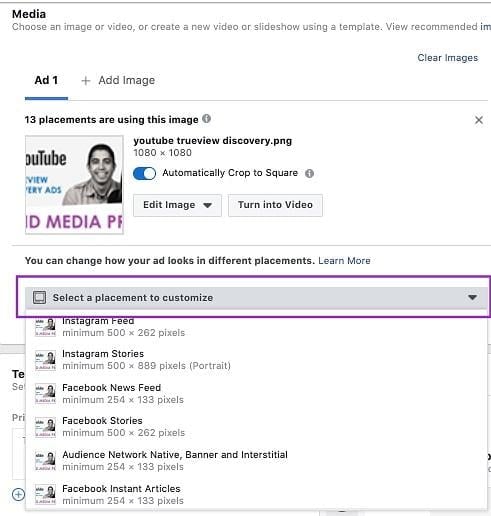
In the “Media” section of your ad builder, there’s a small drop-down menu with a header: Select a placement to customize.
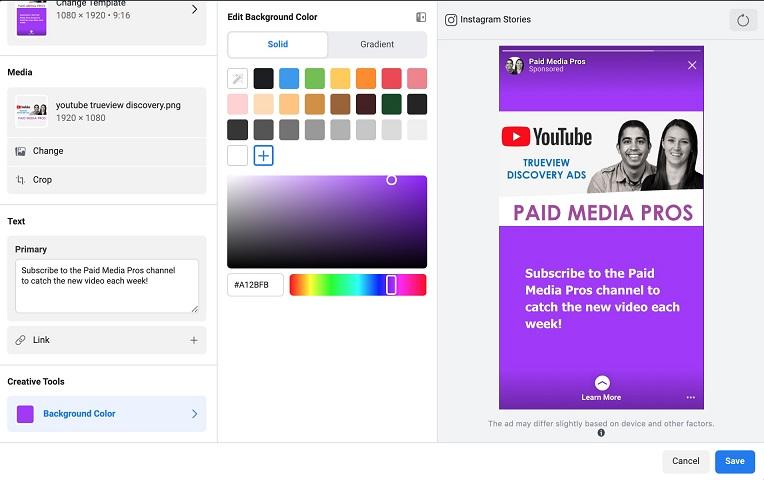
This will open up a list of all the placements you’ve opted to show your ad. For each you select, it will open an editor that looks something like this:
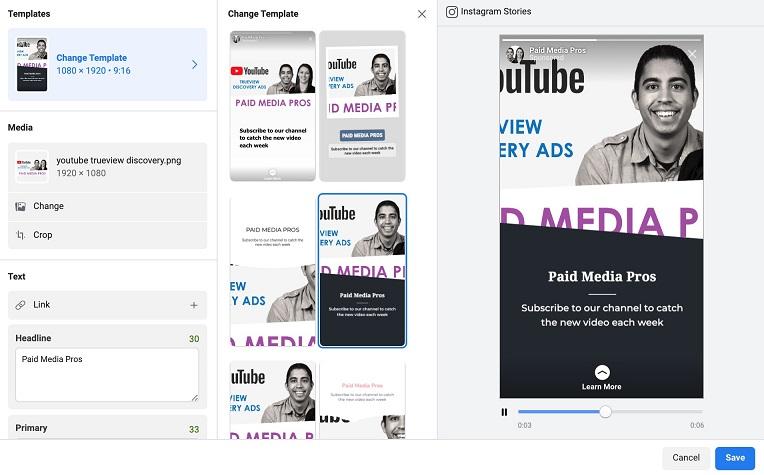
I chose the Instagram Story ad option, as it has the most tools for customization.
On the right, you’ll see a preview of your ad as you have it set up in the editor and on the left is a menu of tools you can use to customize your ad for that individual placement. In this instance, Instagram Stories.
Template
The first option available is the template. Opening this editor will give you a number of, you guessed it, templates of Instagram Stories to choose from. This is an option only available in the Stories section of the network, so take advantage where you can.
Just like the typical Facebook ad editor, as you change your settings, the preview on the right will update.
If you’re not able to customize individual creatives for Stories like some of the larger brands can, templates will give your Instagram Story ads a bit more life over your competition just by adding a little design to the mix.
Clearly, the image above wouldn’t be a great edit as it cuts off a decent amount of the text and, might I say, an important face. But we may be able to salvage it.
That brings us to the next portion of the editor, the media section.
Media
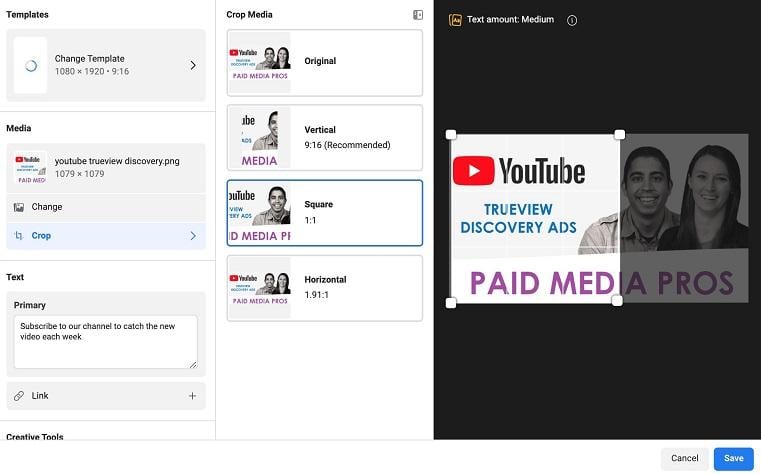
In this section, we can choose to crop the image or change it out altogether. To try and save the same image for this creative, we can try to crop it first.
In this instance, the crop option doesn’t give us a more usable option that still carries all the same information as the original ad. If we want to retain this template, it would be in our best interest to choose a different image altogether. But for the sake of this article, I’ll simply revert to no template for the remainder of the post.
Text
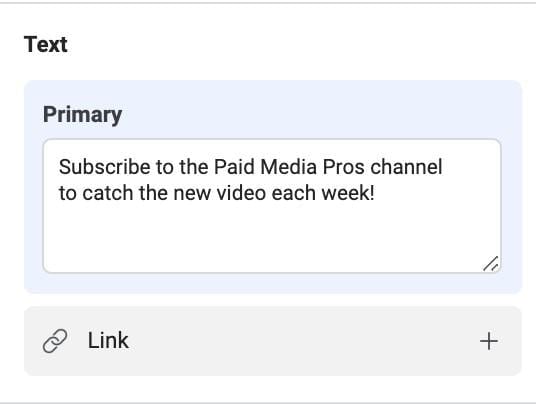
The next section of the editor is pretty self-explanatory, but it allows you to change the primary ad copy and link for the placement you’re choosing to edit.
This is great if you need to shorten or lengthen the text based on the space available and if you want to send users to a different landing page based on the Stories experience.
This section will contain different text options depending on the placement you’re editing. For example, if you’re customizing for the Facebook News Feed, it will also include a headline field for customization.
Background color
The final tool for customization is background color. Here, we’re able to choose from a preset list of colors or add your own brand colors by way of choosing the plus button and then scrolling through the color finder or adding an HTML color code.
You can also choose whether to use a solid color or gradient and with gradient, you can choose the top and bottom color to really make something bright if you feel like it, as I clearly did below.
Once you’ve customized the placement to your heart’s content, hit “Save” in the bottom right and Facebook will take you back to the main ad editor screen, but it will look a little different.
Final views
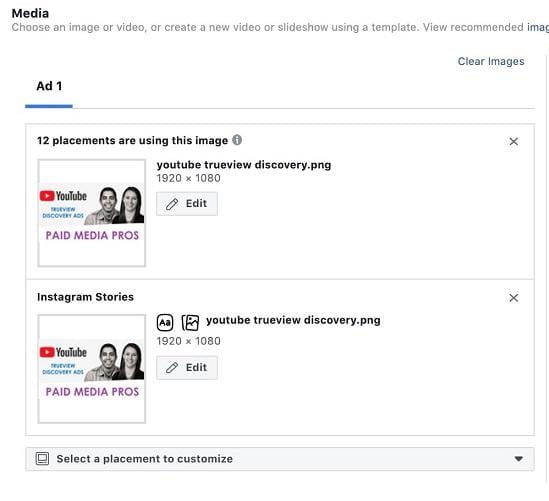
Once you’re finished, you’ll notice there is a new listing in the media portion of the editor.
Now, the media portion will show you each customized version of your ad, and it will tell you the placements it’s being used for.
This will help you keep track of what’s being customized and what isn’t and will save all of your settings for you to easily go back and customize further if needed.
Customize for better Facebook ad placements!
Now that you can customize your ads to look okay in each placement and we agree that performance should dictate what placements we turn off, there’s no reason to have an ad on the Facebook network that only shows to desktop News Feed! Stop spending so much money on the higher cost placements when the others target the same users and your ads can look just fine there. Let your target audience convert where they want and if they simply don’t convert on a placement after you’ve given it a shot, then you have my blessing to turn that placement off. But not before.

