About the Author


Conversion tracking in Meta Ads is an integral tool for getting strong performance from your account and actually understanding what’s driving that performance in your Facebook ads.
In this article, we’ll cover the basics of Facebook ads conversion tracking, provide a step-by-step guide to set it up, and share quick tips to make the process as smooth as possible.
Contents
- What to know about Meta Ads conversion tracking
- Why track Facebook ads conversions with Meta Ads
- What types of actions can Meta Ads track?
- How Meta Ads conversion tracking works
- Core pillars of a successful Meta Ads conversion tracking strategy
- How to set up Facebook ads conversion tracking in Meta
- Quick tips for Meta Ads conversion tracking
What to know about Meta Ads conversion tracking
Conversion actions represent the most valuable engagements your audience can take after interacting with your ads. While clicks and impressions indicate interest, conversions signal intent and business impact.
These actions vary by business model. For some, a conversion may be a completed lead form or scheduled consultation. For others, it could be a purchase, app install, or even a phone call. The key is defining which actions directly align with your business goals—then tracking them accurately.
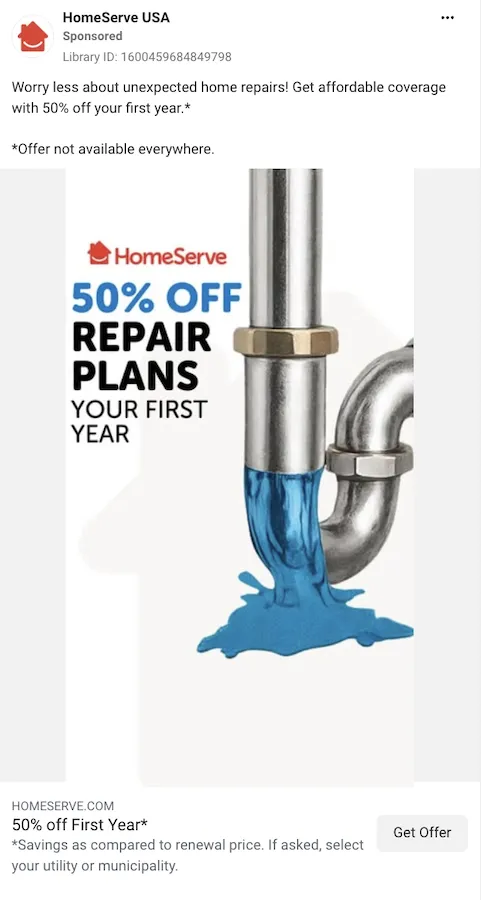
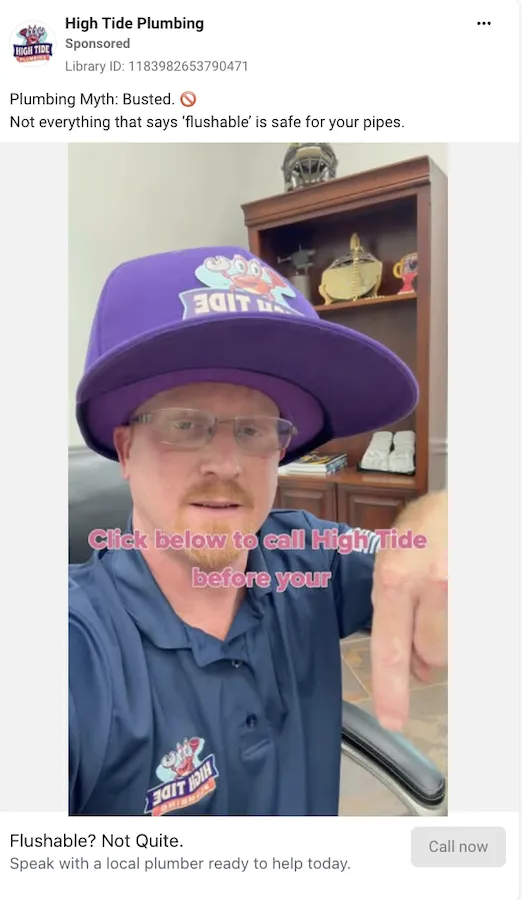
The conversion in this ad would be from anyone who claimed the offer.
🛑 Want to know how your Facebook ads are really performing? Find out with our free Facebook Ads Performance Grader >>
Why track Facebook ads conversions with Meta Ads
While it might seem like an optional step since campaigns can technically run without it, I never launch Meta Ads campaigns for clients without conversions set up. Here are the main reasons why.
Shows you what resonates
Conversion tracking allows advertisers to go beyond surface-level metrics like clicks and impressions. By identifying which ads, audiences, and creatives actually drive meaningful actions, you gain insight into what messaging truly resonates with your target audience.
Helps you optimize toward your goals
Without conversion data, optimization is largely guesswork. With it, you can make informed decisions—adjusting budgets, refining targeting, and iterating on creative based on what drives real outcomes, not just engagement.
Helps Meta find users more likely to convert
Meta’s algorithm relies heavily on conversion data to optimize delivery. When you track conversions effectively, you provide the platform with the signals it needs to identify and prioritize users who are most likely to take action—improving performance over time.
What types of actions can Meta Ads track?
Meta Ads can track any number of actions and events on your website and across different platforms. For the purposes of this article, we’re going to focus mostly on website actions, but there’s some information about phone, app, and offline conversions below as well.
Website events
When you create a pixel and start working through event setup, there’s a list of standard events that include:
- Add payment info
- Add to cart
- Add to wishlist
- Complete registration
- Contact
- Customize product
- Donate
- Find location
- Initiate checkout
- Lead
- Purchase
- Schedule
- Search
- Start trial
- Submit application
- Subscribe
- View content
These actions are typically tracked using the Meta Pixel and/or Conversions API, but are only a preset list of actions that can be tracked based on how you add the pixel to your site.
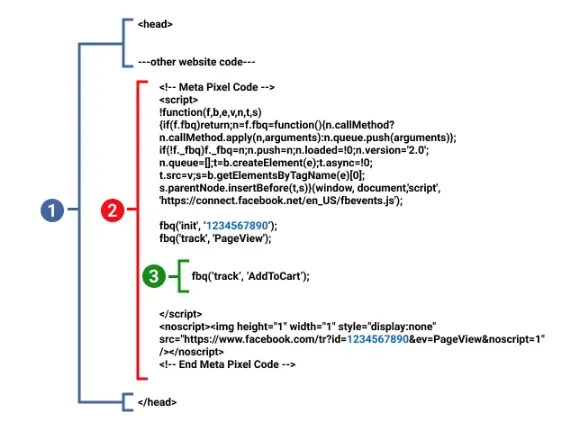
You can also create custom events based on any action on your site by customizing the snippet of code in portion 3 of the image above or by using any of the partner integrations like Google Tag Manager.
Phone calls
While Meta doesn’t natively track calls in the same way as clicks, advertisers can measure:
- Clicks on “Call Now” buttons
- Calls driven through tracked landing pages (via third-party tools)
App performance
For mobile apps, Meta tracks:
- App installs
- In-app events (purchases, registrations, level completions)
This is usually implemented via the Meta SDK or mobile measurement partners.
Offline conversions
These are actions that happen outside the digital environment, such as:
- In-store purchases
- Sales closed by a call center
- CRM-recorded deals
Offline events can be uploaded manually or automatically via CRM integrations.
How Meta Ads conversion tracking works
At a high level, Meta Ads conversion tracking works by capturing user interactions and sending that data back to Meta’s ad platform.
This is typically done through two primary methods:
- Browser-based tracking (Meta Pixel): Tracks actions users take on your website after clicking or viewing an ad.
- Server-side tracking (Conversions API): Sends data directly from your server to Meta, improving reliability and data accuracy—especially in a privacy-first environment.
When a user completes a tracked action, that event is recorded and attributed to the appropriate ad, campaign, or audience. Meta then uses this data for reporting and optimization.
Due to privacy updates and tracking limitations (such as browser restrictions and operating system policies), combining both Pixel and Conversions API is now considered a best practice for maintaining data accuracy.
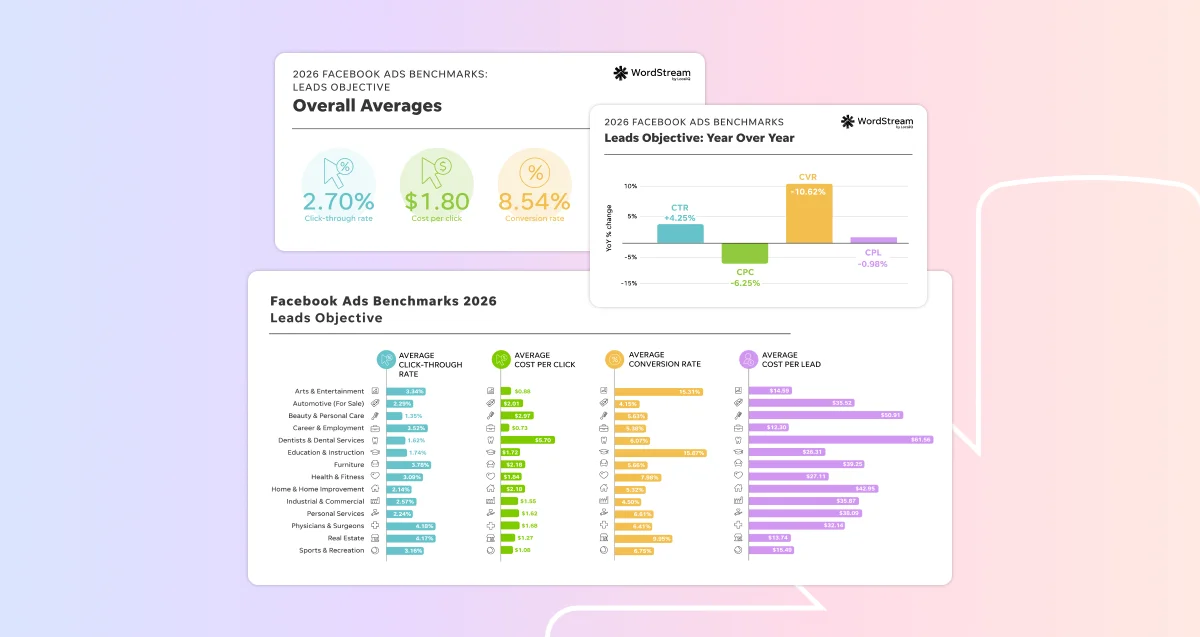
👀 Want to know what results you can expect from Facebook ads? Download our latest Facebook ads benchmarks >>
Core pillars of a successful Meta Ads conversion tracking strategy
Clear conversion definitions
Start by identifying which actions truly matter to your business. Avoid tracking everything—focus on high-value events that align with revenue or meaningful engagement.
Proper event configuration
Ensure events are set up correctly and consistently across your website, app, or CRM. Misconfigured events can lead to inaccurate reporting and poor optimization.
Data redundancy (Pixel + Conversions API)
Relying on a single tracking method can result in data loss. Using both browser and server-side tracking improves match rates and ensures more complete data.
Aggregated event prioritization
With limitations like event caps and attribution changes, prioritizing your most important conversion events ensures Meta optimizes toward what matters most.
Ongoing validation and testing
Tracking is not a “set it and forget it” process. Regularly test events, review discrepancies, and validate that data is flowing correctly.
How to set up Facebook ads conversion tracking in Meta
Here’s a step-by-step walkthrough to set up conversion tracking in your Meta Ads account.
1. Create a Meta Ads Pixel
- Navigate to the Events Manager in your Meta Business Manager account.
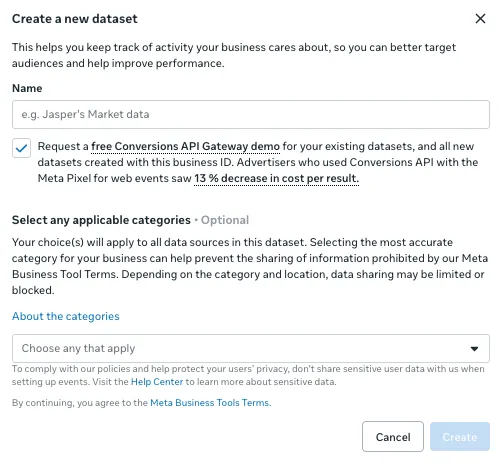
- Click +Connect Data at the top of the page’s menu and select the source you want to connect. For the majority of you, that would be Web.
- Name your pixels.
- You can also have Meta scan your site for (potentially) easier implementation.
2. Install the Meta Ads Pixel on your website
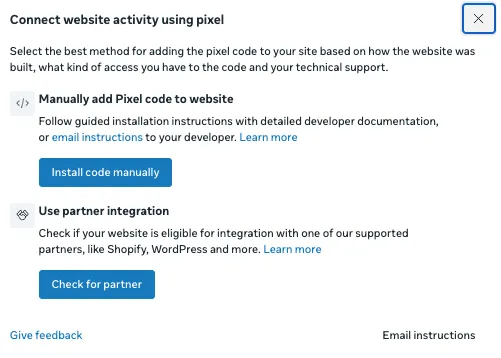
You’ll have the option for three different types of setup:
- Manual install: You add the snippet(s) of code to your website directly.
- Partner integrations: WooCommerce, Shopify, etc.
- Email instructions: You can have the instructions for adding the pixel to your site emailed to your developer.
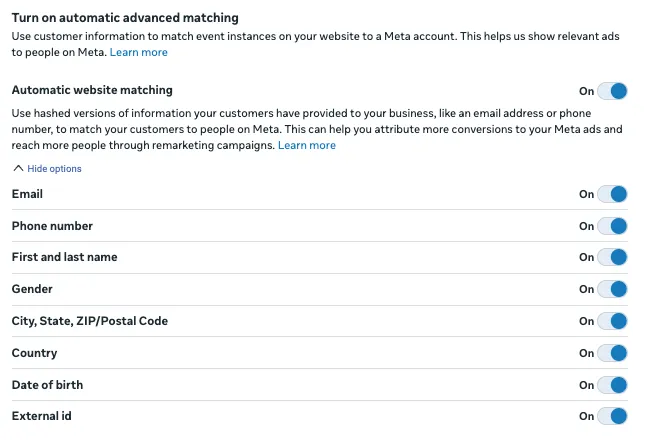
3. Enable advanced matching
This allows Meta to know hashed user information about visitors to your site and match it to their Meta profiles to better track events and actions.
4. Set up events/conversion actions
You can use Meta’s Event Setup Tool to track basic events on your site without using event snippets. Simply open the tool and follow the prompts to get these in place.
You can also install events manually if you need more customization. You can find more information about those here.
5. Test events and verify they’re working properly
Use the Test Events feature in Events Manager to ensure things are firing properly.
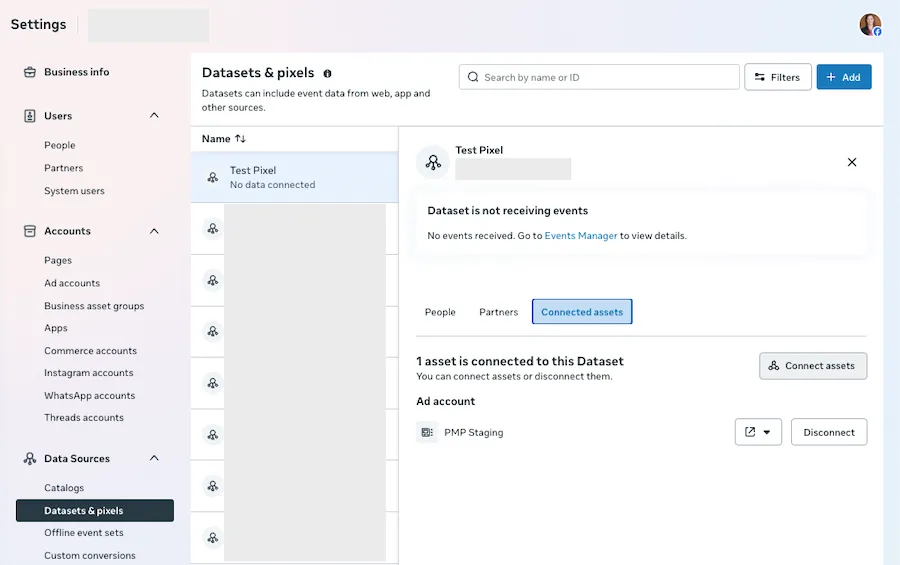
6. Connect your pixel to your ad account
- In Business Manager settings, go to Data Sources > Datasets & Pixels
- Find the pixel you’re wanting to link in the middle column.
- Click Connected Assets on the left, then Connect Assets.
- Choose the ad account you want to use the pixel for, then you’re all set.
Quick tips for Meta Ads conversion tracking
Before you go, I want to give a set of best practices/suggestions for making sure you’re getting the most from your conversion tracking.
- Track fewer, more meaningful events: Tracking everything possible only confuses the platform (and you) about what’s actually working. Track the events that matter and let other metrics tell you the other performance stats.
- Use a consistent naming convention: This can help avoid confusion in reporting and make performance easier to understand at a glance.
- Allow time for learning: Meta’s algorithm, just like all algorithms, will operate better with more data, and new conversion actions need a little time to build up that knowledge bank. (Learn about Facebook’s Learning Phase here.)
- Review your setup from time to time: Depending on how many hands are in the tracking cookie jar at your company, it’s a good idea to occasionally check in and make sure everything is working properly. You never know how a small tweak can impact tracking (or completely take it down).
- Use both Meta Pixel and Conversions API: For stronger data accuracy, it’s recommended to use both methods of tracking to get the fullest picture.
- Expect some discrepancies: No platform is perfect, so you’ll pretty much never see 100% match between your sales dashboard and the Meta Ads interface. Don’t expect perfection.
Start tracking your Meta Ads conversions the right way
Meta Ads conversion tracking is non-negotiable (in my opinion) for strong-performing campaigns. Make sure you’re focusing on the high-value actions your customers can take when engaging with your business and help the platform find more valuable conversions.
Need help running your Facebook ads and tracking conversions? Reach out to see what we can do for you.
About the WordStream Blog
We've been a trusted source of data, news, and strategy for over 15 years. All of our content is written and reviewed by real people: a dedicated team of professionals with decades of combined experience in marketing and advertising for businesses of all sizes.


Add us as a preferred source on Google

Meet The Author
Michelle Morgan
Michelle is the Co-Founder of Paid Media Pros. She has twelve years of experience in all aspects of PPC and brings a wealth of experience developing and executing campaigns across search, social, and display platforms in both agency and in-house settings. Her experience gives her an especially well-rounded and holistic view of the paid search landscape—one she shares regularly as an influencer, author, and industry speaker at events like SMX, HeroConf, and Pubcon, as well as the Paid Media Pros YouTube channel.