About the Author


Meta Ads’ reach is much bigger than it used to be. Originally, posts showed up in the right-hand rail of the desktop version of Facebook, and that’s about it.
But now, after years of expanding placements on Facebook, adding Instagram, launching Threads, and expanding into the Meta Ads network, your ads can reach your target audience in tons of places across the web.
In this article, we’ll cover everything you need to know about placements in Meta Ads and how you can control them (or not) to drive strong campaign results.
Contents
- Full list of Meta Ads placements
- How to find placement controls in Meta Ads
- How to decide which placements to use for your campaigns
Full list of Meta Ads placements
A placement in Meta Ads refers to the individual location your ad can show in on a given platform. Think Facebook News Feed, Instagram Reels, and more.
Here is a full list of the placements available in the Meta Ads network:
| Placement | Where you can appear |
| Feeds | Facebook Feed Facebook profile feed Instagram feed Instagram profile feed Facebook Marketplace Facebook right column Instagram Explore home Facebook Business Explore Threads feed |
| Stories and Reels | Instagram Stories Facebook Stories Messenger Stories Instagram Reels Facebook Reels |
| In-stream ads for Reels | Facebook in-stream reels Ads on Facebook Reels |
| Search Results | Facebook search results Instagram search results |
| Marketing messages | Marketing messages on WhatsApp |
| Apps and sites | Audience Network native, banner and interstitial Audience Network rewarded videos |
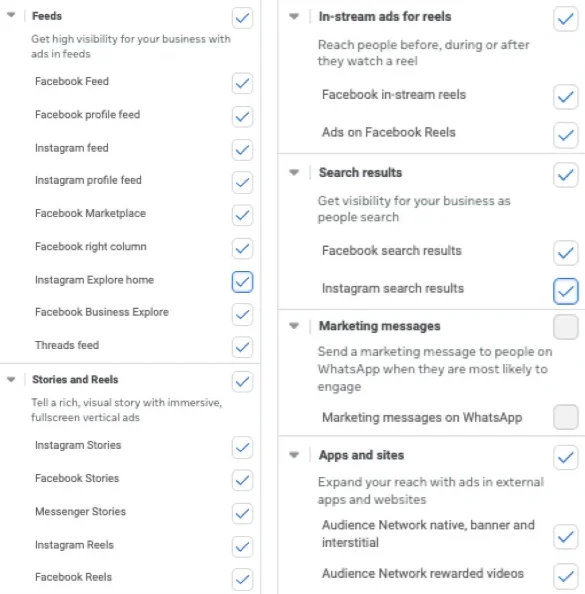
Depending on your settings, your ads will either show up in some or all of these locations across the Meta Ads network.
💡Ready for more? Get The 16 Most Effective Strategies for Facebook Ads Success
How to find placement controls in Meta Ads
While the settings are a little hidden, there are several ways to control which placements your ads show in.
At the ad set level
The ad set level is the easiest place to find all of the placement controls for your campaigns.
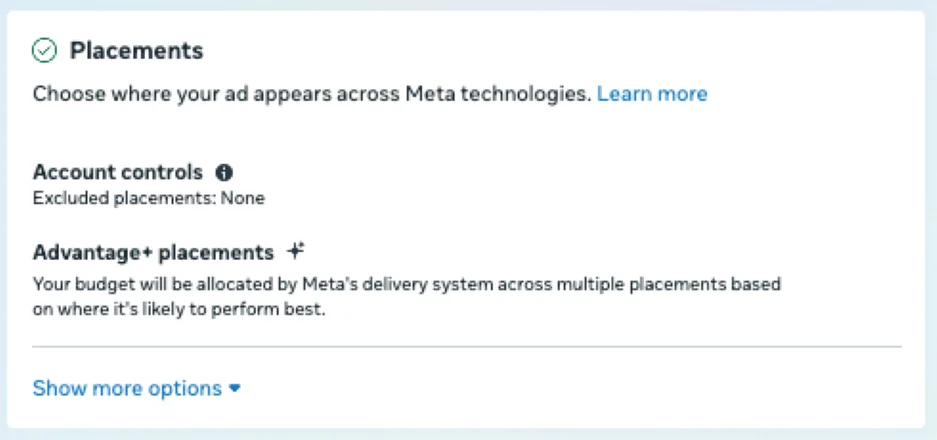
At the bottom of the control panel, you’ll see a Placements box that looks like the above image.
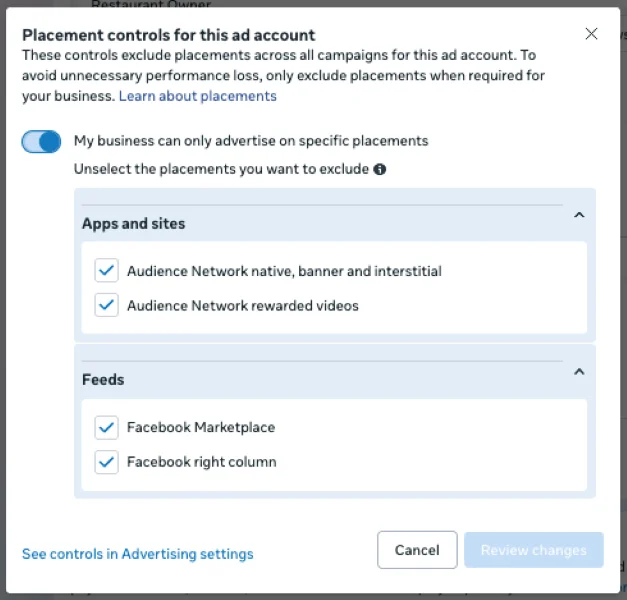
The first listed item is Account controls. If you hover over and open those controls, you can choose to exclude certain placements in the Audience Network, Facebook Marketplace, and in the right column for the entire account simply by unchecking the box next to them.
Likely, account-level placement exclusions are something only a few advertisers will need, but this does make it convenient for those who need it.
Below the account-level setting, you’ll see Advantage+ placements listed. If you hover over that, you can see the pencil icon and Edit show up in the upper right.
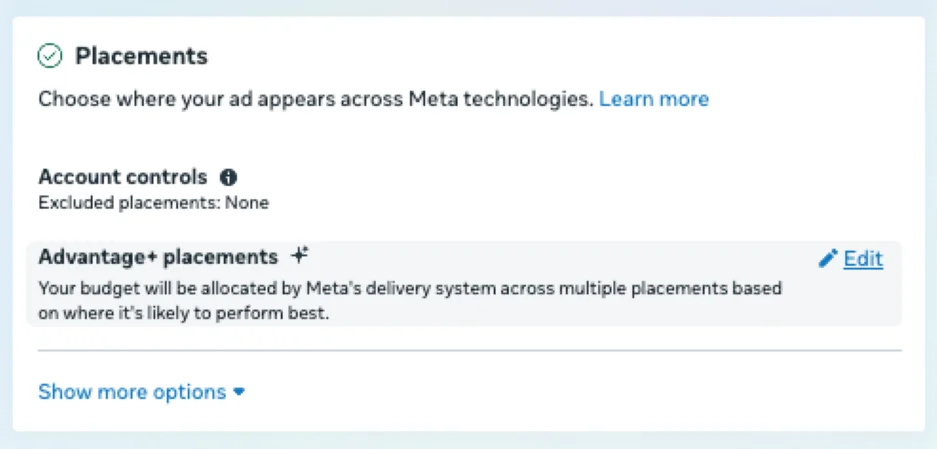
Once you click on that, you’ll see the options for Advantage+ placements vs. Manual placement targeting. Here’s the difference between those two:
- Advantage+ placements: Ads can run on any placement around the Meta Ads Network. Meta states that ad delivery is based on where it thinks your ads will perform best.
- Manual placements: Ads will only run on placements the advertiser has opted into and will not be shown in those that haven’t been selected. What’s not stated here is that Meta will still try to serve your ads in placements it thinks will perform well; it just won’t show them in locations you’ve opted out of.
In the device control menus
If you tap Manual placements, a new portion of the settings opens. From there, you can control several other options.
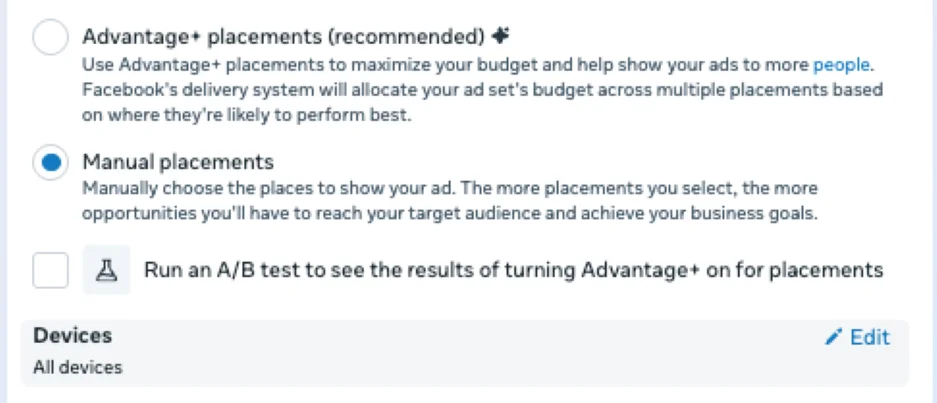
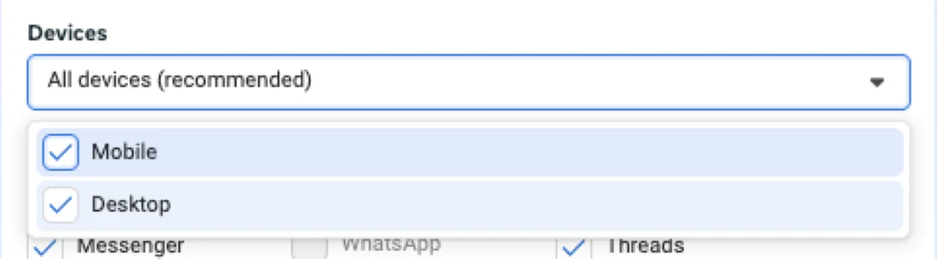
The first (and smallest) set of controls is going to be devices, found right under the A/B testing checkbox. The setting is so small it’s very easy to miss. Just like finding the Manual placement option, you have to hover over the Devices header to get the Edit pencil to show up in the upper right.
Once that’s open, you can choose to focus on just Mobile or just Desktop devices. A pretty simple set of controls, but don’t worry, there’s more on devices below.
If you scroll all the way down to the bottom of the page, you’ll see a small “Show more options” link. When you click that, you’ll get the options you see below.
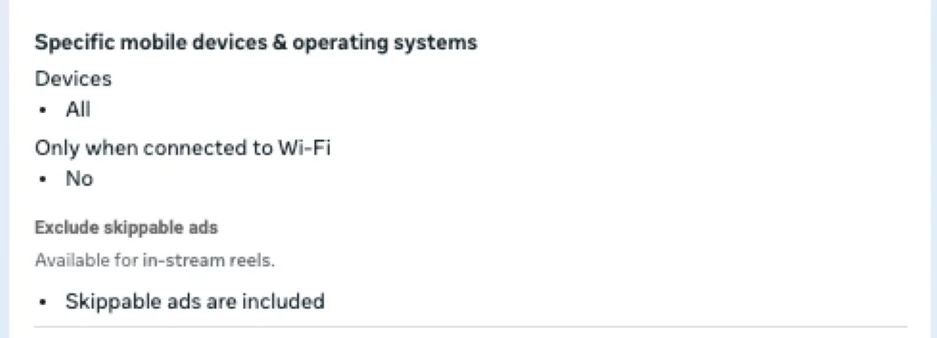
Just like all the other sections, you have to hover over the names to get the Edit pencil to show up, but once you do, you’ll have the following options.
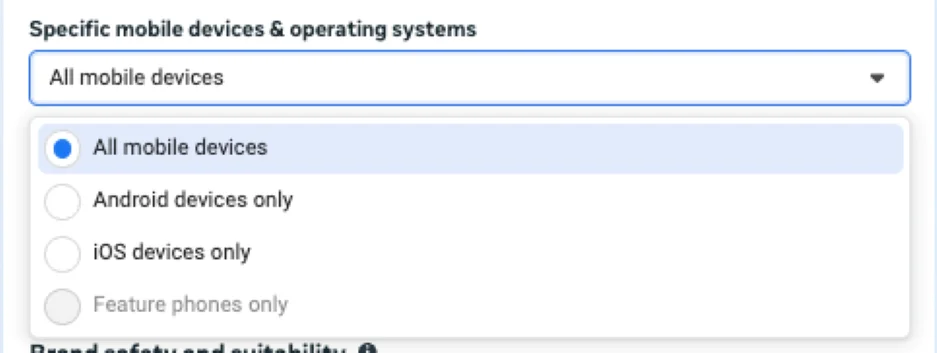
They might not look like much, but if you select one of the operating systems, you’ll gain access to several more controls.
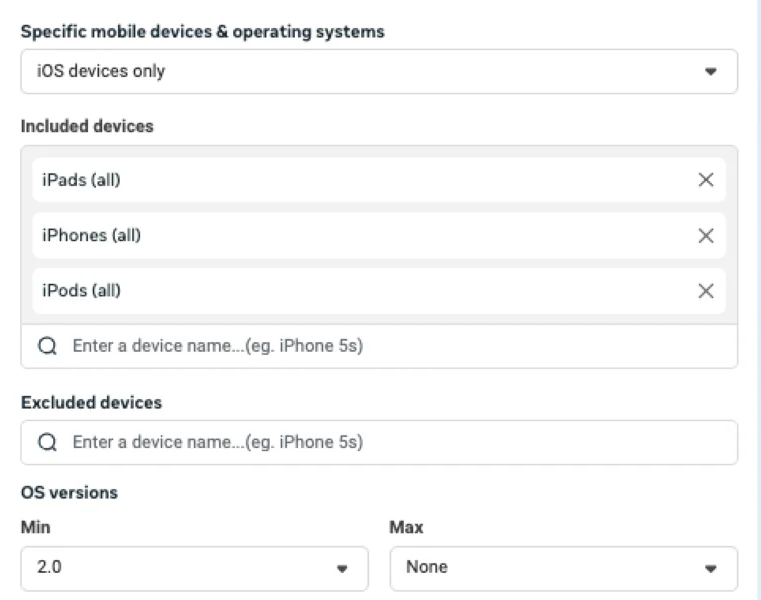
For iOS, for example, you can remove targeting for iPads, iPhones, or iPods as you want.
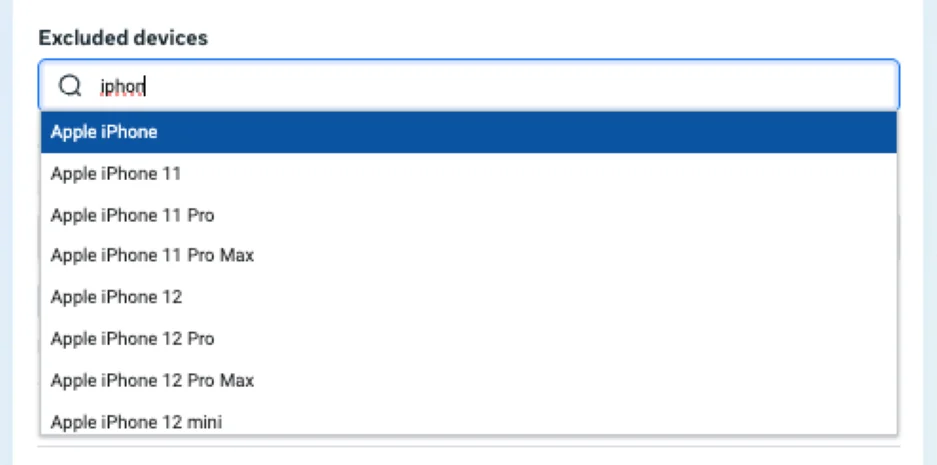
You can also exclude specific devices just by searching for them in the exclusions window.
Below that, you can also choose the minimum and maximum operating systems.
The controls for Android devices are pretty much the same, just for the Android versions, obviously.
The last two placement controls in this section are as simple as a checkbox.
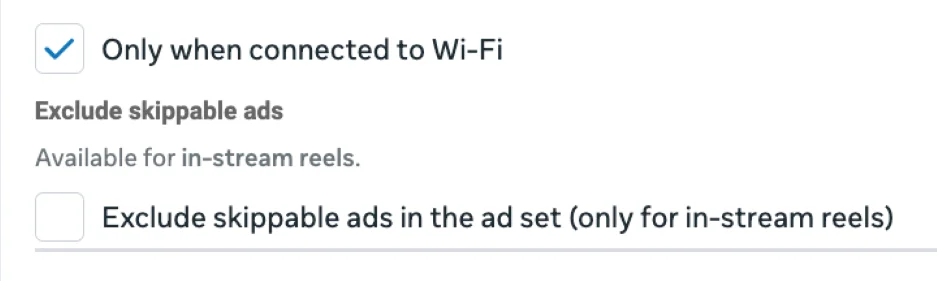
The first requires only users who are on Wi-Fi to see your ads. This can be helpful if you’re worried about your website loading quickly.
The second allows you to exclude skippable placements, meaning your full ad will be viewable for ads up to 15 seconds.
😃 Social media marketing doesn’t have to be hard to be effective. Download The Definitive Guide to Social Media Marketing (Simplified!)
In the platforms and placements menus
Hopping back up to just below the first set of device controls, the first set of checkboxes we come across are for the platforms as a whole.
By checking or unchecking these boxes, you can opt for your ads to run on or be excluded from all of Facebook, Instagram, Threads, Audience Network, Messenger, or WhatsApp (depending on your campaign type).
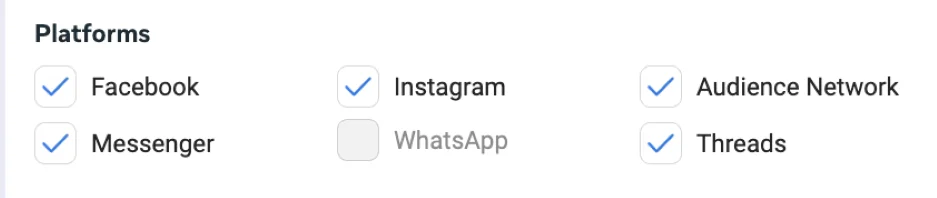
Below that, we have the full list of placements I showed earlier. If you click a checkbox next to one of these platforms, you’ll notice in the longer table below that many of the placements will be removed based on the platform checkbox. In the image above, I opted out of Facebook, and about half of the Feeds placements went away.
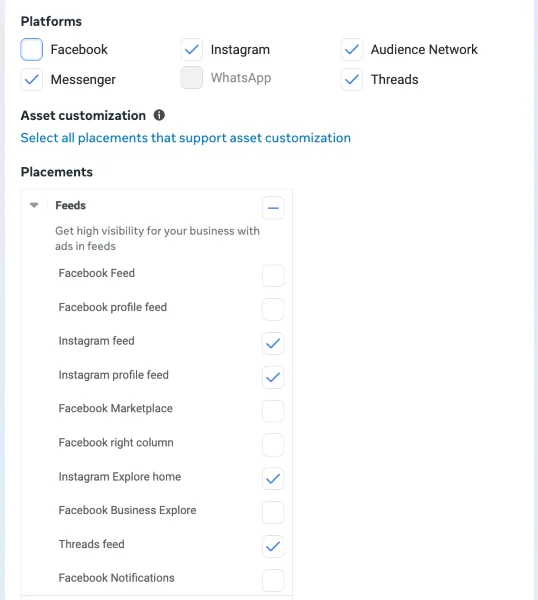
In the full table of placements, you can select individual placements that you want to show in, or you can uncheck the box if you don’t want to be there.
You’ll also notice there’s a checkbox next to “Feeds” at the very top. That lets you opt into or out of all placements of that type. If for some reason you don’t want to be listed in Stories and Reels, you can uncheck that box and it’ll remove all placements in that group.
With the limited spend controls menu
A new feature Meta rolled out recently allows advertisers to give some grace when it comes to the placements they exclude.
Meta contends that its platform will get you the best results if you use Advantage+ placements because it has the widest reach and the most flexibility to find your target audience.
But some advertisers don’t want certain placements to take over spend. Here’s where the limited spend control comes in.
When you exclude a placement from the list, a new setting will show up below the table. You’re opted into this setting by default, and it allows Facebook to spend 5% of your budget on placements you’ve excluded if Meta thinks it will improve performance.
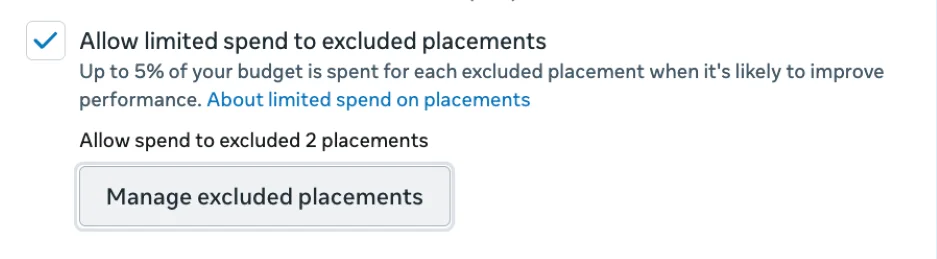
Personally, I think this is probably an okay expansion, as sometimes the lesser-loved placements can perform well. The problem is when they take too much budget away from other placements.
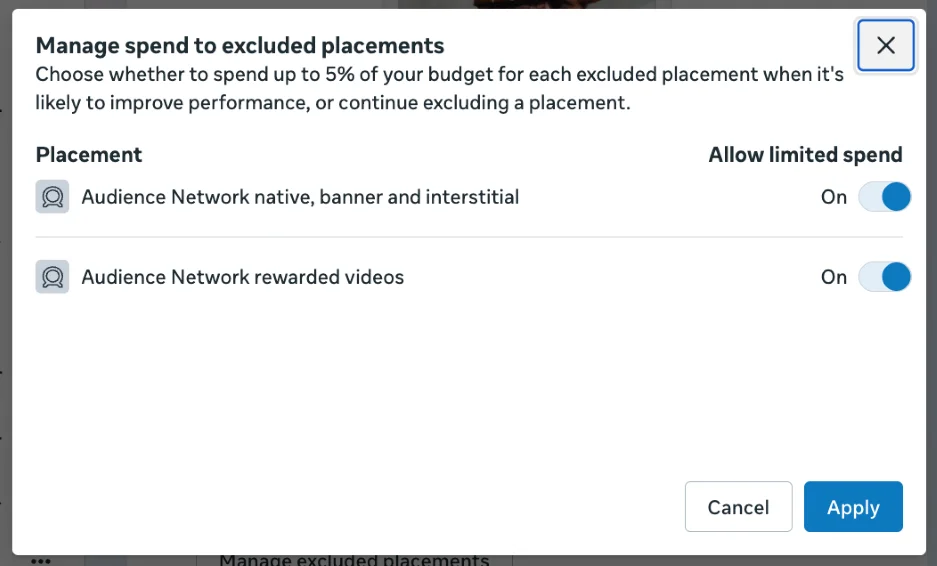
But there’s one additional layer to this setting that I really like. If you click the Manage excluded placements button, you can then toggle to choose which placements can get the 5% wiggle room and which have to be entirely excluded.
For my example above, I excluded only the Audience Network placements, so those are the only 2 in this list that I have to choose from.
How to decide which placements to use for your campaigns
Now that we know what all the controls are and you’re aware of how to find which placements are which, the question is: “Which ones should I use?”
If you’ve been reading marketing blogs for any amount of time…I think you already know the answer.
It depends!
Every business has different needs for where their ads can show. But I would say there are some considerations that all businesses should think about.
Placement control vs. content suitability
The most common issue I see with advertisers opting out of certain placements is that they think they’re controlling for the content around the ads, which isn’t true.
A placement is simply where your ad can show around the Meta Ads Network.
If you’re worried about brand safety and want to have some say in what content you show up next to, what you’re really looking for are the content and suitability controls.
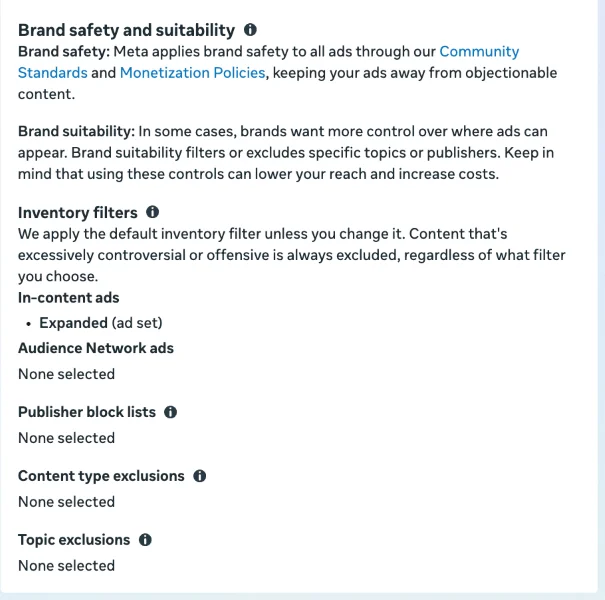
These live in the advanced settings at the bottom of the placement controls.
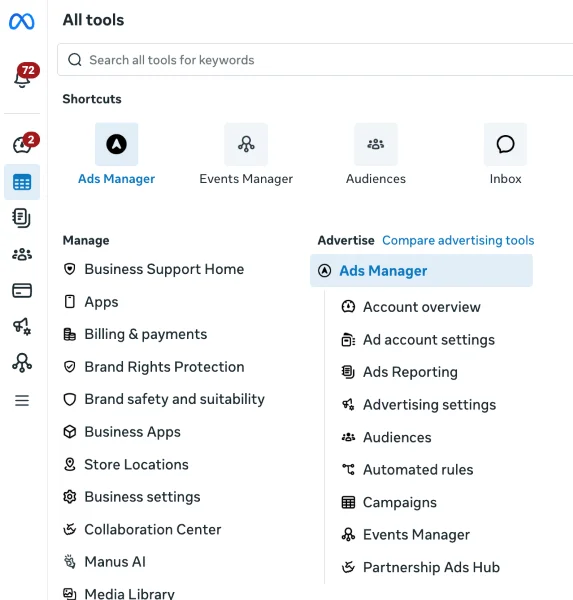
They can also be found in the main navigation under Manage > Brand safety and suitability.
You can learn more about Meta’s brand safety and suitability controls in this video or in this blog post.
Ad creative considerations
Each of the different placements around the Meta Ads system will make your ads look different because each has its own dimensions.
But this is an easily overcome issue depending on your design capabilities. Each time you make an ad, you get the opportunity to customize it by placement and crop it to fit into all placements.
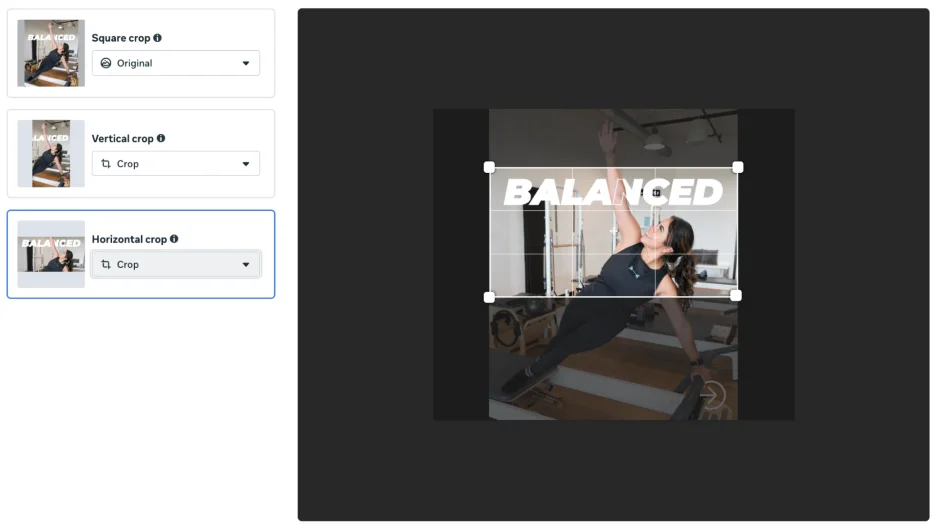
In the end, there are really only three orientations you need to worry about: square, vertical, and horizontal.
With the tools Meta gives you, you can crop an ad from one orientation to another, or you can completely swap out an image if you have one designed for that orientation.
In my opinion, it might take a little design work, but the way an ad is going to look shouldn’t be a reason to exclude a placement.
Advantage+ placements vs. manual options
When Meta claims that their platform does better with full control of placements, they’re usually right. From my experience, the less you try to restrict the Meta algorithm on placements, the more you’re likely to see decent performance.
Almost always, if a placement isn’t performing to your standards, it’s not performing to Meta’s either.
For the vast majority of advertisers, I believe automatic placements are the right move.
Using performance to plan placements
Despite me saying Meta usually limits spending on placements that don’t perform, I can’t say that’s a trusted rule of the platform.
The only reason I exclude placements for my client accounts is based on actual performance.
Once your campaigns have been running for a while, you do have the ability to see how each placement you’ve opted into is performing.
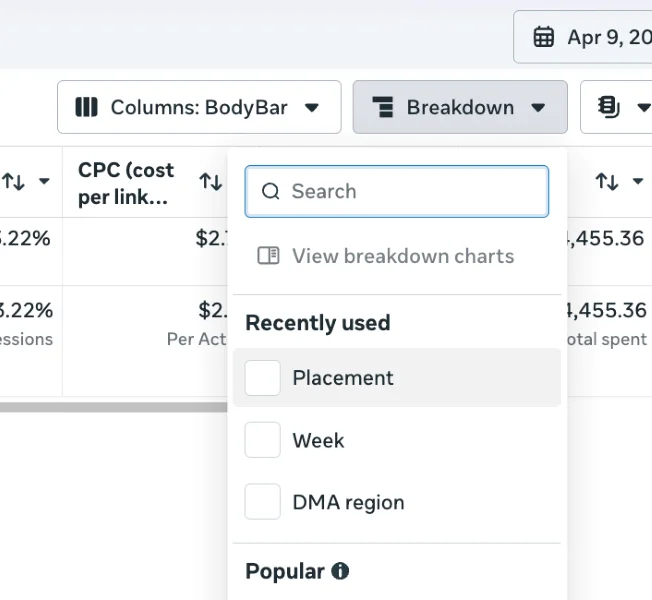
On the campaign, ad set, or ads tabs, above the performance table, you can click the Breakdown button, then select Placement.
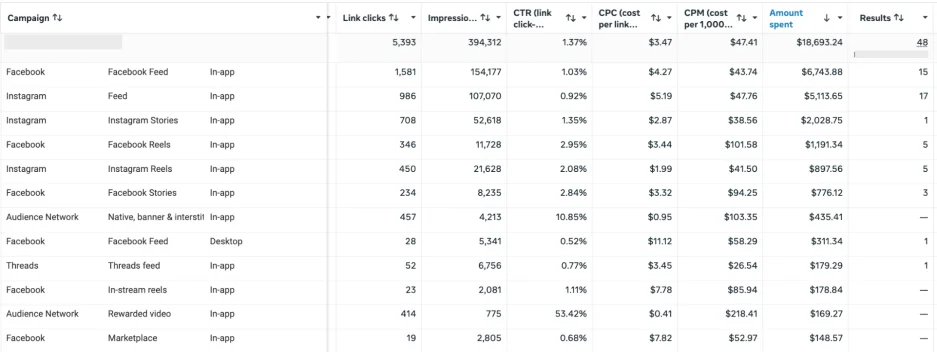
From there, you’ll have each line broken down into multiple rows (the actual number will differ depending on how many placements you’re using). Each row will have 3 columns, including:
- Platform
- Placement
- Experience location
To the right, you can see performance for each placement. Everything from clicks to cost to conversions is available here and can help you decide whether a placement needs to be excluded.
Get to know your Meta Ads placements
As you can tell, there are quite a few ways you can choose which placements your Meta Ads show. But I don’t really think they’re useful for most folks. You’ll likely see the best performance with Advantage+ placements. If you notice patterns in your placement performance and want to take charge, review this guide to learn how.
Meta Ads are a lucrative way to promote your business. They can also be complex. Reach out, and we’ll show you how our digital marketing solutions make it easy to get the most out of each campaign.
About the WordStream Blog
We've been a trusted source of data, news, and strategy for over 15 years. All of our content is written and reviewed by real people: a dedicated team of professionals with decades of combined experience in marketing and advertising for businesses of all sizes.


Add us as a preferred source on Google

Meet The Author
Michelle Morgan
Michelle is the Co-Founder of Paid Media Pros. She has twelve years of experience in all aspects of PPC and brings a wealth of experience developing and executing campaigns across search, social, and display platforms in both agency and in-house settings. Her experience gives her an especially well-rounded and holistic view of the paid search landscape—one she shares regularly as an influencer, author, and industry speaker at events like SMX, HeroConf, and Pubcon, as well as the Paid Media Pros YouTube channel.
Recommended for you


![How to Run Watch-Worthy Facebook Video Ads [Complete Tutorial]](https://www.wordstream.com/wp-content/uploads/2026/03/facebook-video-ads-feature-image.jpg)