This is the third post in our series on creating and analyzing AdWords ads. In the first two posts we walked through creating a Google Ads text ad and creating a Google Ads image ad. Today’s post will focus on an alternate means of creating Google Ads image ads: using the Google Ads display ad builder.
Using the Google Ads Display Ad Builder
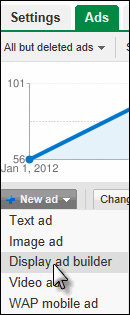
The display ad builder has a lot of different features and options, so we’ll walk through some of the different things you can leverage the tool for in your Google Ads (AdWords) campaigns. First you navigate to the tool and start to create a new ad with it:
The first decision you’re faced with is the type of “template” you want to leverage in your campaign. In the left navigation of the display ad builder product you have a lot of options:
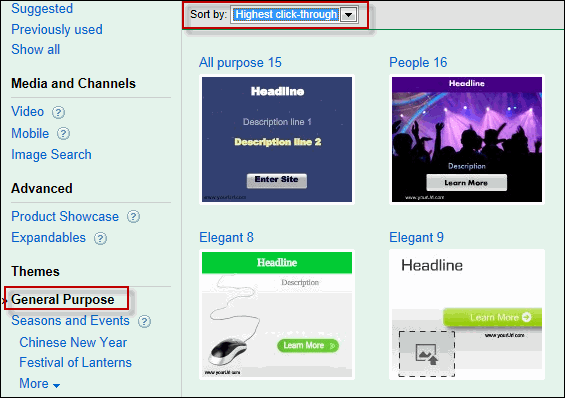
As you can see there are a number of “themes” and templates available to you. Assuming you’re creating a standard image ad for your display campaign, you can either leverage the featured/suggested/show all options or the specific themes (the seasonal or industry-specific options). Once you select a category of ad you’ll be shown the different visual templates available in each section:
As you can see you’re also offered the opportunity to sort the ads by:
- Newest
- Most Popular
- Highest Click-Through Rate
Since you’re likely looking to drive qualified traffic using these ads, I find it’s best to consider the “highest click-through” and “newest” ads first as these have a history of working from a CTR perspective in the case of highest click-through, and are fresher in the case of the newest ads. The most popular ads are just that: the ads being most often used by other advertisers. One of the major disadvantages to using the display ad builder is that the ads can sometimes be too cookie-cutter and not sufficiently customized to your own brand and offering; choosing the ads most frequently used by other advertisers actually exacerbates this problem.
In choosing a template you want to keep in mind a few things:
- Which ads best match the look and feel of your landing page? Remember anyone who clicks your ad will be sent to your landing page; you want that experience to be fluid and consistent.
- Which option offers the best means of messaging to prospects? Choose a theme that will give you the right amount of space with your headline, benefit statement, and call to action while also positioning each of these properly.
- Which ad maps most closely with your goals? If you’re using this display campaign for direct response, you want an ad that will be differentiating, disruptive, and eye-catching – which best accomplishes that? If you’re using the ad more for branding, which layout most closely aligns with your brand and allows for the best use of your logo and brand colors?
Also note as you’re evaluating your options in this initial screen that the colors the ad currently uses can be changed:
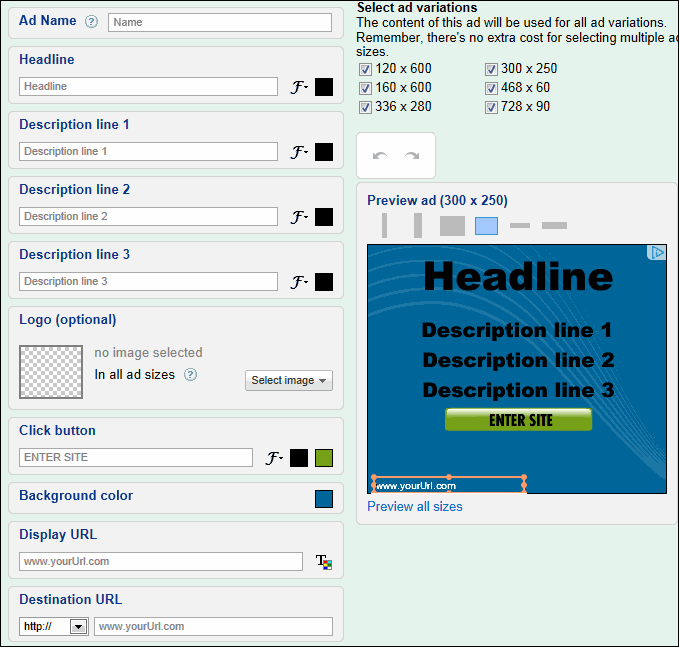
As you can see the next step in customizing your ad with Display Ad Builder is applying:
- Colors and fonts
- Your logo
- Your display and destination URLs
If you’re severely design-challenged, you might try to enlist someone with at least a bit of a “design eye” to make these customizations, but altering fonts and colors is actually quite easy, particularly if you’ve chosen a template that already fits well with your site’s basic look and feel and will incorporate your logo and messaging well.
Also note that much like with uploading a display ad, we’re presented with a series of size options. As I mentioned in the last post in this series (on creating an image ad) creating your ad in multiple formats offers you an opportunity to have it show up in multiple formats, and is generally a good idea (you get to see how your creative performs on a variety of different sites).
Finally you’ll be presented with a preview of your ads – take a moment to review the ad layout in different formats here, as the different shapes can sometimes change the look and feel of an ad fairly dramatically.
That’s it! In a matter of minutes you can have a presentable image ad created for your Google Ads campaigns. While this really is a very handy tool, it’s worth noting that often having an ad professionally designed to be a bit more customized and differentiated can more than pay for itself in terms of improved performance. That said, the Display Ad Builder can be invaluable if you’re looking to:
- Get an ad or series of ads up very quickly
- Need to rotate ads in and out seasonally or for frequent promotion (and need control and speed in this process)
- Are looking to test one or a few headlines/basic concepts and would like to get feedback quickly before committing design resources to building out different banners
And many small to mid-sized advertisers in particular can build out a perfectly profitable display campaign without engaging any design resources and costs whatsoever by leveraging the Display Ad Builder.
Read More: 8 Super-Creative Display Ad Ideas


